DIY - Wheel Bearing
An excellent DIY detailing how to fix a wheel bearing.
Many thanks to Wez
This mod can be discussed in the DIY section of the forum
This was done on a 2.0l 1st gen with ABS.
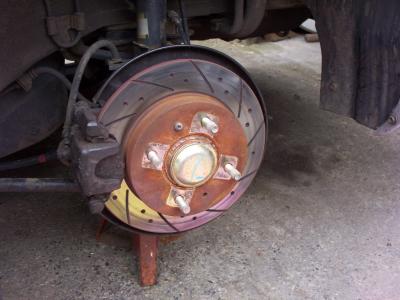
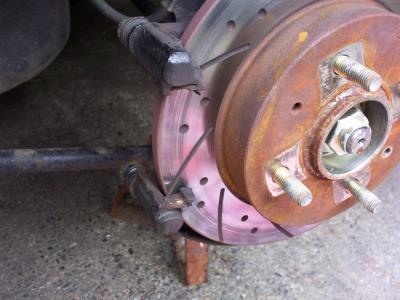
Hopefully by this stage you will have jacked the car up on level ground and
dropped it onto an axle stand, then removed the wheel. Like the pic below; (the
disc is not pink, i had a pink blanket on the ground )
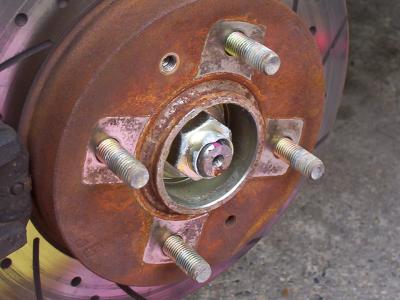
You can see in the pic that there is a screw holding the disc on, and a cap
covering the hub nut. These need to be removed, the cap comes out easily by
prying it out with a flatbladed screwdriver. The screw will come out but may
take a bit of persuasion, if not chop the top of the screw with a chisel.
Hopefully you will be at this stage;
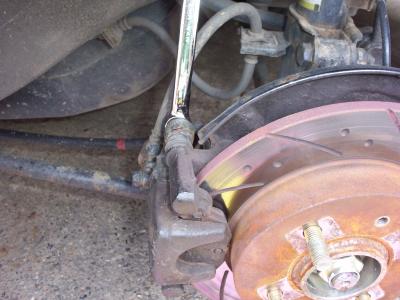
Now the calliper/piston assembly has to be removed, firstly the handbrake needs
to be released. DO THIS SLOWLY, IF THE CAR MOVES AT ALL PUT IT BACK ON. It
should not move being on an axle stand, you might hear a creak of the pads
letting go of the disc. You will need a 14mm spanner or socket to remove the 2
bolts holding the piston. You can see the top bolt to be undone in the pic, you
will see the other bolt underneath it.
The piston assembly may take some jiggling and prying out if it has been a
while since it was removed. A cable tie was used to keep the assembly out of
the way.
Now the pads need to be removed from their housing. The ease of this will also
depend on how clean your callipers are. If they have not been out for a while
then the pads will be jammed in the calliper with muck/break dust. Just be
careful prying them out if you dont have new ones to put in. You should be left
with the following;
Again using the 14mm spanner/socket remove the 2 bolts holding the remainder of
the calliper onto the hub;

The disc is now only held on by dirt and rust, it needs to come off. A tip to
do is use a hammer and hit around the disc between the studs, this will shock
the back of the disc and hopefully release it. Then tap the disc off and store
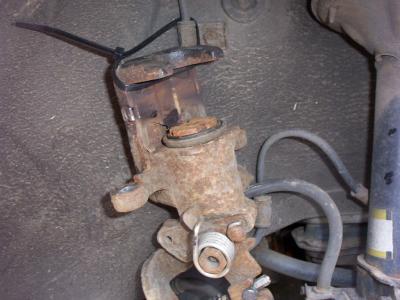
it somewhere safe. You should now see the hub/bearing assembly;

Take notice of how close the teeth on the back are to the ABS sensor.
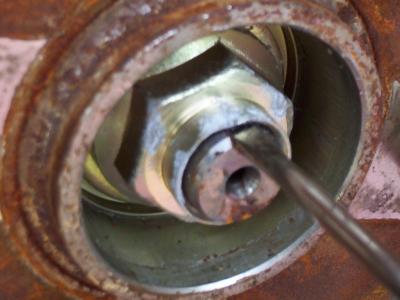
The nut has an extension to the front of it, part of this is bent into the
slotted shaft, this is to stop the nut from working loose. Use a screwdriver or
similar to prise this back out of the shaft. Take care not to damage the nut as
you may need to use it again - i did!
You will now need a 32mm socket with a long extension to remove the nut. I
tried braying the living daylights out of it with a hammer but it never budged.
I put a pipe over the bar to get extra leverage and it cracked straight off.
The hub/bearing will just slide straight of the shaft.

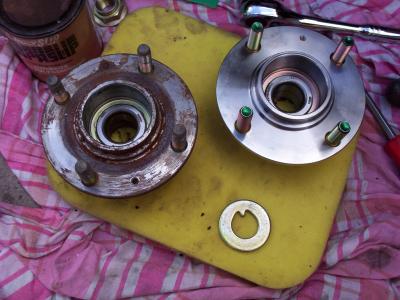
Be sure to compare the old hub with the new one;
I panicked a bit here as the new nut was far to big to go onto the shaft, the
socket to fit it was the same but it slid staright over the threads. That is
why its important to be careful with the original nut. Also there were fewer
teeth on the cog for the abs sensor, i did not know if the sensor is just
looking for the on/off signal, or if the on/off signal was timed and compared
with the other wheel. You will also need to transfer the washer from the old
hub, this had a tab on it that sits on the slot on the shaft. You can see the
washer in the pic above.
Ensure the shaft is clean from any dirt or burrs. If available smear a very
light coating of copperslip or grease on the shaft (and i mean light). Slide
the hub over the shaft, make sure the bearing does not get pushed out of the
hub and that the hub goes the full way on.
BE CAREFUL NOT TO DAMAGE THE ABS SENSOR and make sure it is the same distance
as before.
Slide the washer on, now the nut. You will need a torque wrench to tighten the
nut to 200-230Nm or 143-164lb/ft. ( i got my wrench from screwfix for just over
a tenner) Now use a pretty thck chisel or similar to push the notch on the nut
back into the shaft. A blunt chisel would be ideal, a sharp chisel or
screwdriver may split it.
Then just replace the rest in reverse order. You could put some copperslip on
the inside of the disc so it comes of easier next time and so it finds its own
centre.
When putting the calliper back clean the metal plates that the pads slide on, a
wire brush is ideal. Also add a tiny amount to the sliding part of the pads.
Refit wheel and remove axle stand. Take for a spin to make sure noise/vibration
etc has gone. I went for a little run round the block, the noise was gone and
no ABS light came on so the number of teeth must not matter. I could not go for
a proper run as i have mismatched pads on at the moment on the front. You could
tell the difference though
Big thanks to Dean for getting me the bearing